

Sign up for trending news and first dibs
A Guide to Better Sneaker Shots
A Guide to Better Sneaker Shots
Step up your sneaker shots game with this simple sneaker photography guide.
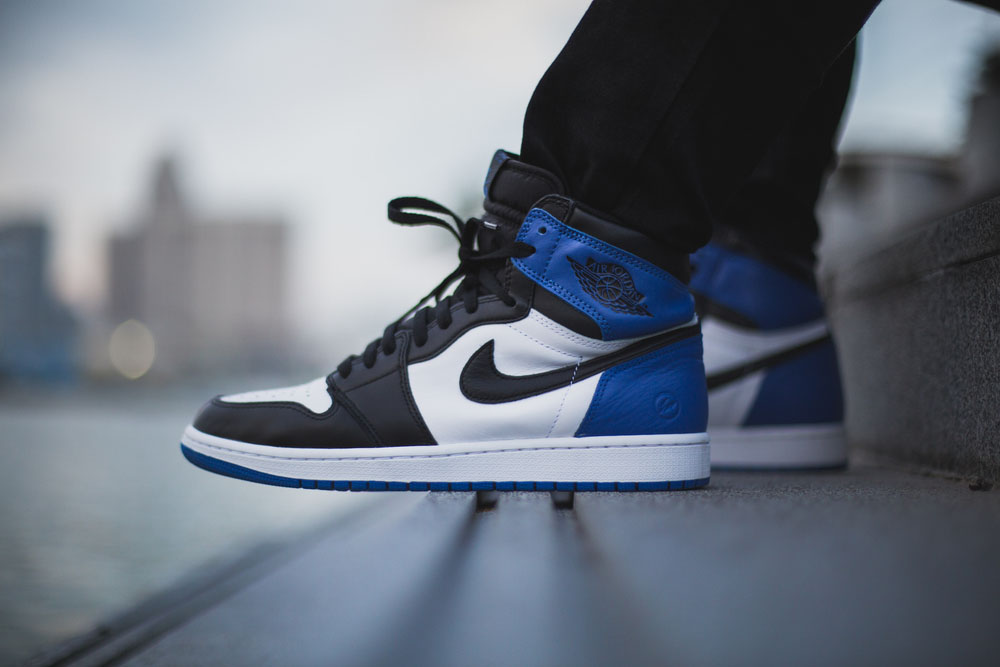
image via brokentoysoldiers.com
There is no denying that social media, Instagram in particular, has helped to keep the sneaker scene alive. Pictures paint a thousand words and so, without having to come up with awesome captions, here’s a guide to taking sneaker shots so arresting your followers will love you, and your haters will have no choice but to like your pic.
1. Equipment and Settings
These days, mobile phones make good substitutes for the traditional DSLR but for best results, it is highly recommended that you invest in a handheld camera with adjustable settings and interchangeable lenses. It doesn’t have to be a DSLR; Micro 4/3 systems can work just as well. Be sure to equip yourself with some fast lens – with an aperture of f2.8 or wider (more on aperture to come), with f2.0-f1.4 being most ideal.
What is aperture? It’s how wide the lens blades can open, which also determines how much light enters into your lens. It follows the concept of the human eye – the wider you open your eye (e.g., aperture f1.8), the more light enters as compared to when you are squinting (e.g., aperture f7.0). Grasp this concept and you’ll be able to achieve stunning night shots without a flash and blurry backgrounds such as the bokeh (explained in details below). For beginners, switch your function dial to Aperture Priority which is labeled as “A” or “Av”, depending on your camera.
Using the analogy of the eye to explain shutter speed, it simply means how long your eyes are open for, which translates to how long you let light into your lens. The longer your shutter speed, the brighter your resulting image. We will apply this function to night shots, which is covered at the end of this guide. Shutter Priority is labeled as “S” or “Tv”.
2. Basic Techniques to Improving Your Shots
Now that you know the requirements of taking better pictures, let’s dig right into the technicalities of it all.
1. Avoid taking pictures from the front
If you view a sneaker from the front, you’re missing out on 80% of the features of the shoe, including the sides, where most of the details can be found, as well as the overall silhouette of the shoe. Our advice: Angle your camera 45 degrees to the shoe so you can capture its lateral panels as well as the tongue and laces.
2. The Bokeh
Open your eyes, put your finger near your face and focus on your finger. Now repeat the same process but with your finger held at a further distance from your face. Do you notice the difference in the background blur between the former and latter? This is the very concept required to achieve a bokeh. In layman’s terms, the closer your lens is placed to your shoe, the blurrier your background becomes. This of course is a general guideline and results depend on the characteristics of your equipment.
3. Lighting and a Scenic Environment
If possible, try to opt for natural light if the situation permits or even catch the last two hours of sun before it sets. Known as the Golden Hour, the lighting is the softest and warmest during this period of time, which will create some stunning images.
At the same time, scout for a scenic environment and by scenic we don’t only mean breathtaking backgrounds; it could be as simple as finding a textured wall or a wooden floor that can add elegance to your image. Go out, walk routes never walked before and let your imagination flow to see how you can blend your shoes in with the environment.
3. The Levitating Shoe
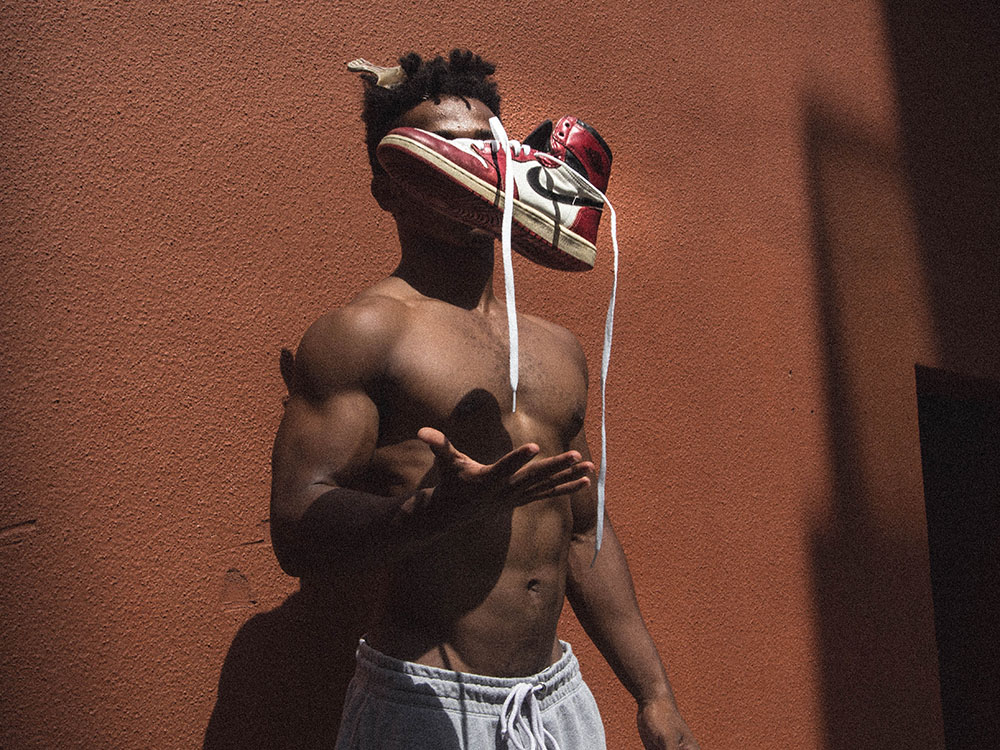
image via @timsuen
Achieving the Levitating Shoe isn’t as difficult as it appears to be. The first thing you have to do is set your camera’s focus mode on AF+Tracking which translates into Auto-Focus and Tracking. This helps your camera maintain focus on the shoe while it is moving in the air.
Next, instruct your model to hold the shoe at arms length from his body around waist level. Attain focus of the shoe and keep your shutter half pressed. At the count of 3, get your model to throw the shoe vertically in the air and fully depress the shutter. It might take a couple of shots until you get your perfect shot but with enough practice and familiarization of your camera it will be like second nature. It’s all about timing, timing, timing.
4. The Water Trail and Perfect Splash
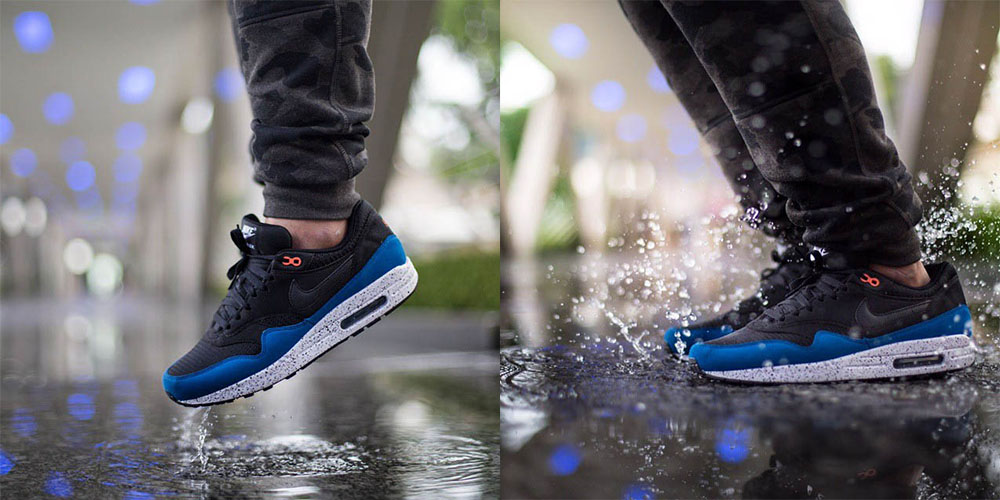
images via @deepie
The Water Trail or Perfect Splash shots follow the similar concept as the Levitating Shoe: focus and half-press, jump on 3 and snap. Your result simply depends on when you release your shutter. In fact, you can secure both shots in one jump if you’re quick enough. The key to getting a stunning water trail is when you lift off from a tip-toe stance. Give it a try!
5. The Puddle/Floor Reflection
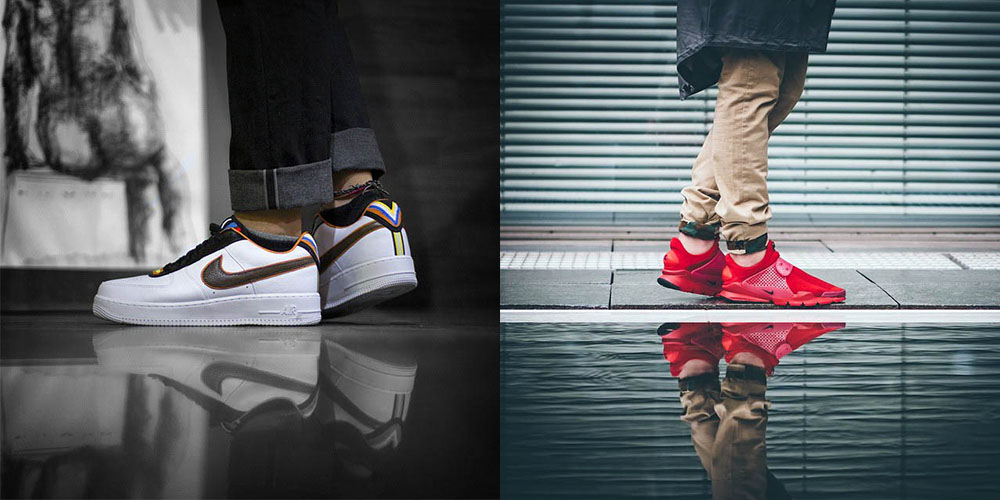
images via @vsceral and @pangeaproductions
A rainy day may be a downer, but it’s a good opportunity for great photos leveraging off nature’s mirrors (puddles). Place your model at the end of the puddle with his closer foot half-submerged in the water.
If the shoes are way too precious for a wet day, look for a reflective ground like a marble floor and you’ll get the same effect. Lower your camera as close to the ground as possible and what you will see is a clear reflection of the shoe. It is that easy.
6. The Night Shot
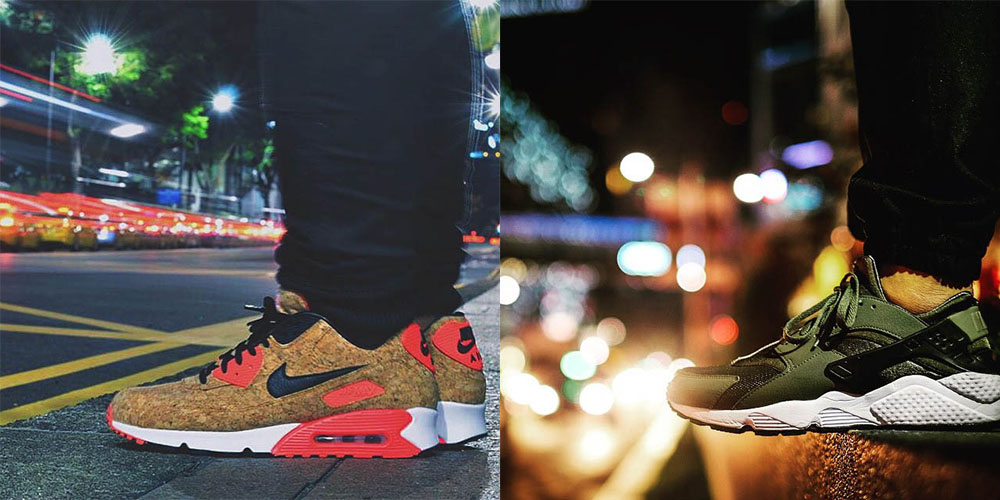
images via @feekeed and @complexryann
A flash may seem like the simplest solution to your low-light issues but most of the time the composition of the resulting picture appears to be extremely unnatural, which we try to avoid. To tackle low light environments you can shoot with either Aperture Priority or Shutter Priority, both of which will require a tripod or a stable surface to avoid camera shake, and therefore a blurry picture.
If you’re on Aperture Priority, bump up your camera’s ISO settings (ISO is the measure of the sensitivity to light). Adjust your ISO according to how grainy your pictures are. Take a few shots at various ISO settings to gauge your camera’s ISO characteristics. At the same time, keep your lens wide open i.e., the lowest f-stop number which is the number written on the lens itself.
Alternatively, you can switch to Shutter Priority and increase the time the lens is open for. Make sure that your object remains stationary to keep the image in focus. Fun fact: if there are moving vehicles in the background you will see streams of light in your image.
For more sneaker shots, check out #straatgram on Instagram. Also, add #straatgram to your uploads for a chance to be featured on @straat0sphere.
Subscribe to our Newsletter
We’ll pull up to your inbox weekly with the hottest news, style guides, drops and leaks
By subscribing, you agree to our Terms of Use and Privacy Policy
TAGS
Tags:


